Implementing a Stereoscopic Skybox into Unity for Virtual Reality
If you are developing for Virtual Reality in Unity, taking advantage of the depth and fidelity that a stereoscopic skybox provides can greatly enhance your projects. Unfortunately the process of incorporating this isn’t super obvious. I was lucky enough to have the enormously talented Scott Garner explain the process to me, and I thought I’d share it for anyone stuck trying to accomplish the same thing.
TLDR: Save this shader to your project as Skybox Shader, drag two cubemap images into the left and right cubemap boxes, make a Skybox Materialand under Shader choose your shader material, then under Window > Lighting > Settings, set the shader as your SkyboxStereo material.
Out of the box, Unity provides a skybox shader, just not a stereo shader. You can (download all of Unity’s shaders here). Luckily, the code for accommodating a stereoscopic image is not that different than for a single image.
As you probably know, there are different projection methods for 360 degree images exported from 3D programs (cubemap, spherical, cylindrical). In this example, I’ll be using a cubemap. You can find Unity’s cubemap skybox shader here.
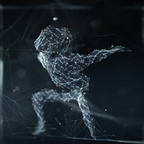
We won’t cover how to create the actual stereo skybox (that’s a question for a 3D expert) but you’ll probably end up with something like this:

Here, there are two nearly identical images, only one image has its position slightly to the left, and the other slightly to the right, to account for the perspective you would be seeing from the left and right eyes. So to support stereo, your cubemap will need to accommodate two images as well. Here’s the modified code of Unity’s Cubemap Skybox Shader that allows for that:
And if you look at the revisions for this gist, you’ll see what changed from Unity’s version.

Basically, we’re allowing for two cubemap textures, _TexLeft and _TexRight.
Then we’re running a check on something Unity provides called unity_StereoEyeIndex. If the eye index is 0 , we supply the left eye image, otherwise, we supply the right.
Now, to get your image into this shader, the process is as follows:
If your image is stacked, as shown above, separate it into two separate images, one for left, and one for right.
Import the two images into your project. Then, highlight each image in the project navigator, and in the inspector window, make sure the texture type is set to Default and that the TextureShape is set to Cube. You can leave the Mapping set to auto in most cases, and Unity will automatically detect what projection method to use for your image. Hit apply, and Unity should convert your image into a cubemap texture.

Once you’ve done this for both images, save the above gist into your project. I put it in a Shaders folder inside my Assets directory as something like SkyboxStereo.shader .
Then highlight this material in your project navigator, and in the inspector, you should see two slots for Cubemap images. Drag your two textures into their respective boxes, and you have a working stereo skybox shader.

Now you need a material that uses this shader. Right click in your project hierarchy window under Materials and choose Create > Material and call it SkyboxStereo. Under Shader choose Skybox > CubeMapStereo. Now you can assign this skybox material as your scene lighting.

To see it in your scene, go to Window > Lighting > Settings and under Environment > Skybox Material choose your SkyboxStereo material.
Now to see the full effect, put on a VR headset, build and run your VR-ready project, and see if you notice the difference from a single image skybox. It’s subtle, but if you’ve done a good job in 3D, the depth should be noticeably more immersive.